Leek Pizza with Creamy Onion Sauce

I realized it has been quite a while since we shared a pizza recipe with you…  So to break the hiatus I’m posting a very unique pizza.  It doesn’t have your typical red sauce or its more gourmet cousin, white sauce.  It’s not a sauceless/olive oil pizza either.  Instead, it’s topped with a creamy golden sauce unlike anything you’ve ever tried on a pizza.

Leek Pizza

The sauce is made by caramelizing onions, to bring out their natural sugars, then simmering them in cream.  This sauce paired with a blend of mozzarella and gruyere, leeks, green onions, and rosemary makes for a scrumptious gourmet pizza.  The toppings may sound unusual, but you’ll love the flavor!  This pizza is not my brain child but comes from one of my favorite cookbooks, My Pizza by Jim Lahey.  If you’re a pizza lover it’s a must own!

Leek Pizza with Creamy Onion Sauce

Prep Time: 1 hour

Cook Time: 5-7 minutes for Brick Oven Style, 15-20 minutes for traditional baking

Serves: 2

Ingredients

No-Knead Pizza Dough
1 Leek, white part only
3 oz. Fresh Mozzarella
2/3 c. grated Gruyere Cheese
3 Green Onions
pinch chopped fresh Rosemary
Freshly-ground Black Pepper
Creamy Onion Sauce
3/4 Onion
1/8 tsp. Red Wine Vinegar
1 tsp. Olive Oil
leaves from 1 Thyme Sprig
pinch Salt
1/2 c. Cream
1/2 tsp. Lemon Zest
1/4 tsp. Salt

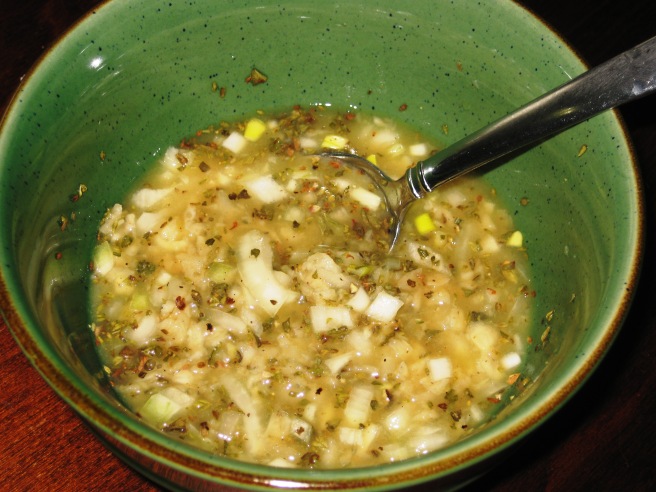
1.  First you need to caramelize the onions for the sauce.  Cut the onion in half then into strips ~1 in. thick.  Separate the slices and place them in a bowl.  Toss with the red wine vinegar, olive oil, and thyme leaves.

2.  Put the onions in a small pot, cover, and turn heat on to medium-low.  Cook for 20 minutes stirring occasionally.  Make sure to keep an eye on them so they don’t burn!

3.  Uncover, toss in a pinch of salt, and continue to cook, stirring occasionally, for 30 minutes.  They should turn a beautiful golden color.

Caramelize Onions

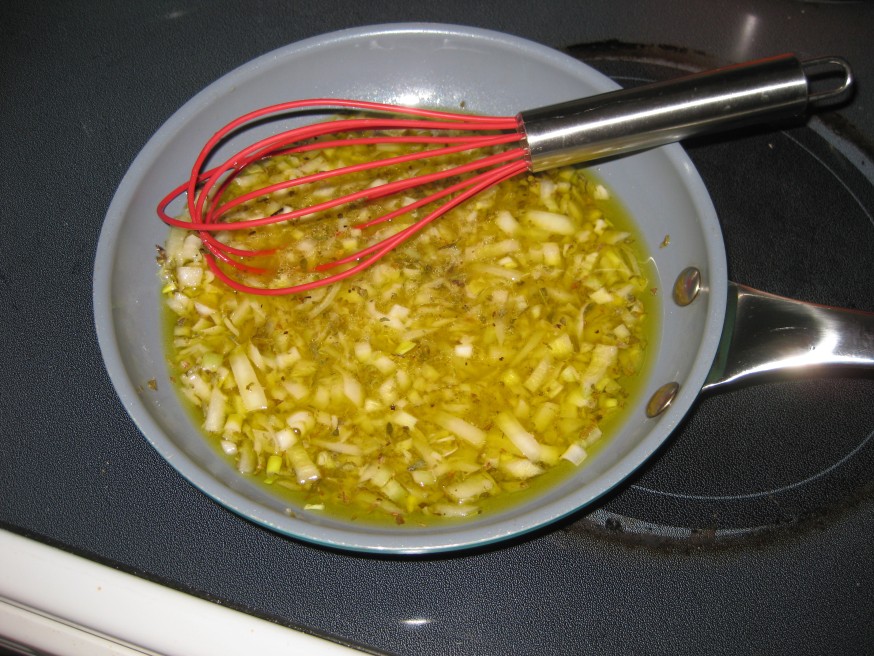
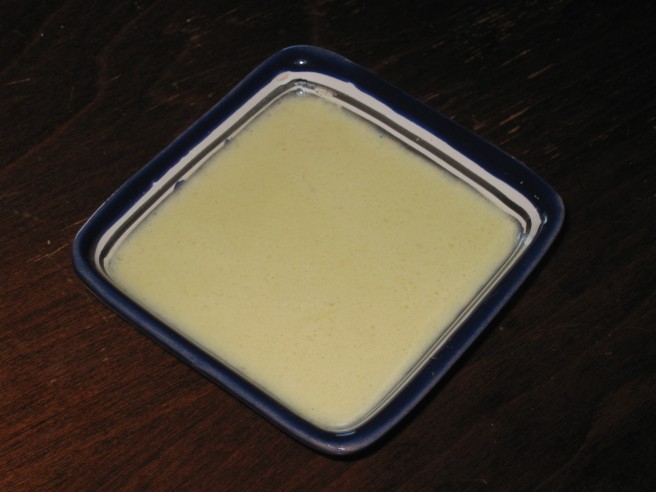
4.  Add the cream to the pot and increase heat to medium.  Cook, stirring occasionally, until the volume is reduced by half (5-10 minutes).  Stir in the lemon zest and salt.  Transfer the mixture to a blender or food processor and blend until smooth (I use my immersion blender).

Creamy Onion Sauce

5.  While the sauce is cooking, thinly slice the white part of the leek.  If you’ve never worked with leeks before, they’re a slightly sweet member of the onion family that looks like a giant green onion.  If you like them on this pizza and want to eat more, try them charred – they’re wonderful!

6.  Bring a small pot of salted water to a boil and blanch leeks 2-3 minutes.  Drain and set aside.

7.  Top crust with onion sauce.   Pull mozzarella into clumps and spread over pizza.  Next, sprinkle on the gruyere.  Add the leeks and green onions.  Finally, scatter the rosemary over the pizza and top with freshly-ground black pepper.

Top Pizza

Bake 5-7 minutes using our Brick Oven Method or 15-20 minutes at 425°.  (Don’t forget to preheat your pizza stone if you’re using one!)  The cheese should be golden and bubbly and the crust should be starting to char.  Just look at this masterpiece…

Leek Pizza

Let the pizza set and cool for about 5 minutes then slice and serve.  One bite and you’ll know it was worth the effort!  And I bet you’ll have to go back for another piece…

Leek Pizza Slices

Want to try more of our pizzas?  We’ve got a recipe to suit every mood: Check out our Pesto Pizza, Barbeque Chicken Pizza, Four Cheese White Pizza, Pizza Margherita, Sausage and Fennel Pizza, or Sausage and Ricotta Pizza.

Quick and Simple Teriyaki Sauce

My name is Rachael, and I’m a teriyaki addict.  It’s one of my absolute favorite flavors!  I’m not exaggerating when I say I have 4 different teriyaki sauce recipes.  And that doesn’t include the teriyaki glaze for our Asian-Glazed Brussels Sprouts.  One sauce is hibachi-style, one sauce is more for grilling, and the other two are for stirfries (which sauce I choose depends on the protein it’s paired with).  Today I’m sharing the recipe I make most frequently, my easiest sauce.

Teriyaki Stirfry

This sauce is a stirfry sauce that I like to use for weeknight meals.  I love stirfries because they’re quick, one-pan meals that are packed with veggies.  My favorite is teriyaki chicken (bet you didn’t see that coming…) with broccoli, carrots, and water chestnuts.  Sometimes I mix it up and go meatless by using tofu in place of chicken.  I used to use a more ingredient-intensive recipe until I found this simpler sauce which is now my go-to.  You just throw all the ingredients in a pot and heat – couldn’t be easier!

Quick and Simple Teriyaki Sauce

Prep Time: < 5 minutes

Cook Time: 5 minutes

Serves: 3-4

Ingredients

3/4 c. Water
1/4 c. Soy Sauce
6 tbsp. Brown Sugar
1 1/2 tbsp. Corn Starch
1/2 tsp. Garlic Powder
1/2 tsp. Sesame Oil

Ingredients

1.  Combine all the ingredients in a small saucepan and whisk together.  Bring to a boil over medium heat and simmer 5 minutes.  Make sure to keep an eye on it so it doesn’t boil over!

Thicken Sauce

That’s it!  Once it’s thickened it’s ready to use.  As I mentioned, my favorite use is a chicken or tofu stirfry with carrots, broccoli, and water chestnuts.  Obviously you can mix and match your favorite proteins and veggies to tailor the stirfry to your taste.  You can eat the stirfry by itself for a light meal or pair it with a side to make it more filling.  I recommend fried quinoa (see our Thai Tofu Stirfry recipe for a great fried quinoa), fried rice, or spring rolls.  I also use this sauce to make Food Network’s Sirloin with Teriyaki Broth which is quite tasty!

Teriyaki Stirfry

Leftover sauce can be stored in the fridge for 1-2 weeks (I always make extra!).  When you want to use it, reheat it in a sauce pan, mixing well.  You may need to thin it with some water – it tends to thicken in the fridge.

Perfect Chocolate Chip Cookies

The smell of homemade chocolate chip cookies always takes me back to my childhood.  It makes me think of warm summer afternoons and playing outside with my brother and our neighbors.  Why does it make me think of playing outside?  Because on some afternoons, if we were lucky, my mom would bring out freshly-baked chocolate chip cookies.  And if I was REALLY lucky my mom would have added peanut butter chips to the dough (my favorite!).  The cookies were still warm and gooey with melty chips – ah, baking perfection.  It’s hard to beat chocolate chip cookies fresh from the oven…

My mom made chocolate chip cookies using the recipe on the back of the Nestle chocolate chip bag.  And they were good.  So that’s the chocolate chip cookie recipe I always cooked until I met my boyfriend.  Chocolate chip cookies are his absolute favorite dessert.  In fact, it’s the only baked good he ever requests.  The only other time I bake is for parties or birthdays (neither of us have big sweet tooths, but who needs temptation laying around on the the kitchen counter?).  Since chocolate chip cookies are his favorite and the only thing he asks for, I wanted my cookies to be better than good…  I wanted them to be the BEST!

Cookie Platter

So I started trying some new recipes.  Eventually I tried the New York Times’ recipe… and hit the jackpot!  Of course, I didn’t try every recipe out there, but I tried quite a few, and these were so delicious that I was content to stop my search.  They were the best chocolate chip cookies I had ever had, and, more importantly, they were the best he’d ever had.  I’m not sure where exactly the magic comes from in this recipe – maybe the savory bites of coarse-grained sea salt or maybe the dark chocolate chips or maybe it’s something else entirely.  Whatever makes them so delicious, you will love them!  And they’re no harder to make than any other chocolate chip cookie recipe.  So take a break from your usual recipe and give this one a try.  You won’t be disappointed!

Perfect Chocolate Chip Cookies

Prep Time: 10 minutes + 24 hour chill time

Cook Time: 15-20 minutes

Serves: ~30 cookies

Ingredients

1 c. minus 1 tbsp. Cake Flour
5/6 c. Bread Flour
generous 1/2 tsp. Baking Soda
3/4 tsp. Baking Powder
3/4 tsp. Coarse Sea Salt
5/8 c. (10 tbsp.) Butter, at room temperature
5/8 c. Brown Sugar
1/2 c. + 1 tbsp. Sugar
1 Egg
1 tsp. Vanilla
10 oz. Dark Chocolate Chips

1.  Sift your flours, baking soda, and baking powder together in a bowl then stir in the salt.

2.  Cream the butter and sugar together until light and fluffy.  Add the egg then the vanilla, mixing after each addition.

3.  Reduce mixer speed to low and gradually mix in your dry ingredients (I do it in 3 stages) until just blended.  You don’t want to overbeat your dough or the cookies will be tough.

4.  Stir in the chocolate chips.  I don’t know about you guys, but there’s something about the sound of chocolate chips being stirred into cookie dough that I just love…

I like to use Ghirardelli bittersweet chocolate chips.  You could use regular semi-sweet chips or even milk chocolate chips if you prefer, but the darker chocolate tastes great in this recipe (and it’s healthier for you!).

Chocolate Chips

5.  Once the dough is finished, wrap it in plastic wrap and refrigerate at least 24 hours before baking.

I know, I know, but you want your cookies now.  You could bake the cookies right away and they would taste great.  But your patience will be rewarded… I’m telling you from experience, if you wait the 24 hours, they will taste even better!

Chill Dough

6.  Drop the dough onto a parchment paper-lined baking sheet (I use a soup spoon) – you want the dough balls a little smaller than golf balls.  Bake at 350° F for 15-20 minutes until the cookies are golden.

Finished cookies

Once the cookies are done, transfer them to a cooling rack and try to wait until the molten chocolate will no longer burn your tongue.  Then dig in!  I love mine when they’re warm and still slightly gooey in the middle with chips that are still liquid when you break them.  These cookies are sure to please even the biggest cookie aficionado.

You can either bake them by the batch, keeping the unused dough in the fridge til you’re ready for more cookies (up to about 5 days), or bake them all at once and store them in an airtight container.  Enjoy!

Peach Herb Lemonade

There’s something about sunny, warm weather that makes me want to relax on the porch… I can’t think of a better way to end a day spent outdoors than kicking back with a refreshing beverage on the patio.  We’ve been fortunate in Juneau so far this spring in that we’ve had a lot of chances to enjoy evenings outside.  Of course, we’ve also had to clean our table and chairs anytime we want to sit on the porch thanks to the insane pollen release this year… EVERYTHING’s been covered in yellow!  Whenever Penguin (our black tuxedo cat) would come in from outside, it looked like he’d had his fur frosted with blonde.  I’m just so glad that neither of us are allergic to pollen!

Anyway, despite billowing clouds of pollen, we’ve been enjoying our porch a lot so far this year.  Our drink of choice has frequently been Alaskan Brewing Company’s Raspberry Wheat – a terrific summer beer!  But since my new Tupelo Honey Cafe cookbook arrived, we’ve also been sipping on this Peach Herb Lemonade…

Peach Herb Lemonade

I really enjoyed Tupelo Honey Cafe’s first cookbook, so when their second was released I made sure to order it.  I bought it for the food recipes, but when I was flipping through it the first time it was their lemonade recipe that caught my eye.  I’d finally made it to their restaurant in Knoxville when I was visiting my family over Christmas this year, and my friend had ordered this drink.  Once I tasted it I understood why it was one of her favorite things on the menu.  The savory element of the rosemary perfectly complements the sweetness from the peaches.  Needless to say, I was happy to see that recipe in the cookbook.

It was feeling like summer in Juneau (and what’s more summery than peaches?!) and I had leftover rosemary in the fridge, so I decided to whip up a batch for our nightly porch-sit.  Of course, I adapted the recipe to make it an “adult” lemonade – because that’s just more fun – by spiking it with rum.  You could probably also spike it with vodka, but I’m just more of a rum person.  I’ve also included instructions for keeping it virgin if that’s what you prefer or you want it to be kid-friendly.  I hope you enjoy this easy and delicious concoction!

Peach Herb Lemonade

Prep Time: 10 minutes

Cook Time: 5 minutes

Serves: 4

Ingredients

3/4 c. Water
3/4 c. Rum (or more water to keep it virgin)
12 oz. Peach Nectar (1 can)
1 c. Lemon Juice
1 1/3 c. Water
1 c. Sugar
4 sprigs Fresh Rosemary

1.  Start by making your rosemary simple syrup: Combine the 1 1/3 c. water with the sugar and rosemary in a small saucepan.  Heat the mixture over medium heat, stirring until the sugar is dissolved.  Once the syrup is boiling, remove from the heat and allow to cool.  Once it is cooled, remove the rosemary and discard.

Tip: To get plenty of rosemary flavor in your syrup, lightly bruise the rosemary with the back of a knife before adding it to the pot.

2.  Combine the remaining ingredients with 1 1/4 c. of the rosemary simple syrup you just made (you should have ~1/2 c. of the simple syrup remaining – the perfect amount for another half batch!).  Mix well and chill before serving.

Note: For a homemade lemonade I like to squeeze my own lemons.  It may add a little time to your prep, but I think it’s worth it.  For 1 cup of lemon juice it usually takes 5-6 lemons.  If you’re using store-bought lemon juice make sure to check the label, sometimes they add extra preservatives (though why lemon juice, which is full of citric acid, would need added preservatives is beyond me…).

This drink is perfect served in a mason jar.  If you’re feeling fancy, add a sprig of rosemary as a finishing touch!

Glass of Lemonade

Now you’re ready for an afternoon/evening of outdoor relaxation!  A friendly word of warning if you do decide to spike it, this drink can be dangerous – the rum is completely masked by the lemonade.  This lemonade would be wonderful for a cook-out, bbq, or pool party.  Need ideas for another summer pitcher drink?  Check out our Peach Tea Cocktail, another beverage perfect for summer entertaining…

Mojo Pork Sandwiches

While I was in Tampa for a conference a few years ago a friend and I walked to lunch after the morning session.  We ended up at a sports bar near the convention center called Hattrick’s.  The place had a bustling lunch crowd – a good sign.  I chose to order a Cuban roasted pork sandwich with mojo sauce, and it was incredible!

Mojo Pork Sandwich

The sandwich was so good that I went back to Hattrick’s before leaving town to get another.  The following Easter I set out to make my own version of this sandwich – I wanted to eat pork but I certainly wasn’t cooking a ham for only two people.  By adapting recipes and adding elements from the Hattrick’s sandwich, I perfected my own Mojo Pork Sandwich.

This is not your typical Cuban sandwich with ham, pork, swiss, and mustard.  For this sandwich, pork is roasted in mojo sauce, a Cuban citrus garlic sauce, then shredded (adapted from Three Guys from Miami).  Then the pork is piled on Cuban bread, topped with melted mozzarella, and paired with a garlic dipping sauce.  The results are mouth-watering!  I promise you’ll love my re-creation of this sandwich…

Mojo Pork Sandwiches

Prep Time: 45 minutes + 2-3 hours marinating time

Cook Time:  3-6 hours

Serves: 6

Ingredients

2 loaves Cuban Bread
6 slices Fresh Mozzarella
2 lb. Pork Shoulder (or other boneless roast)
10-15 cloves Garlic
1 tsp. Salt
1 tsp. Peppercorns
1/2 c. Orange Juice
1/4 c. Lime Juice
1/4 c. Lemon Juice
1 c. minced Onion
2 tsp. Oregano
1/2 c. Olive Oil
Garlic Dipping Sauce
2-3 cloves Garlic
1/4 c. Olive Oil
1/4 c. Orange Juice
2 tbsp. Lime Juice
2 tbsp. Lemon Juice
1 tbsp. Vinegar
Salt
Pepper

1.  Start by making the mojo sauce: Mash the garlic, salt, and peppercorns into a paste using a mortar and pestle.  Depending on the size of your mortar you may have to do this in two batches.

Note: The variable number of garlic cloves is to account for the size of the cloves.  If your head of garlic has nice big cloves, you can probably stop at 10.  If the cloves are smaller you may want to use up to 15.

Stir in the orange, lemon, and lime juices along with the onion and oregano then allow to sit at least 30 minutes.

Mojo Sauce

2.  Set aside about a quarter cup of the mojo sauce for later.

3.  Now it’s time to make the marinade for the roast.  We’re going to do this by simply adding oil to our remaining mojo sauce.  Heat the olive oil in a skillet over medium heat.  Once the oil is hot, remove from the heat and whisk in the sauce.

Marinade

4.  Pierce the pork roast all over with a fork (to help the marinade penetrate the meat).  Pour the marinade over the roast and allow the marinate in the fridge for 2-3 hours, turning halfway through.

5.  After the roast is through marinating, put the pork and marinade in a crockpot and cook on high for 2 hours.  Then turn the heat down to low and cook until the meat shreds easily with a fork (up to 4 more hours).  The cook time will vary based on the size and dimensions of your roast.

Tip: If you want to speed up the cooking process, cut the roast into 2-3 chunks before cooking.

6.  When the roast is almost done, make the garlic dipping sauce: Combine the garlic, olive oil, and vinegar in a blender or food processor and puree until smooth.  With the blade running, gradually pour in the juice to make an emulsion.  To finish, season with salt and pepper.

This will make excess sauce.  The leftovers can be stored in the fridge up to a couple weeks.  Just make sure you let it come up to room temperature and run it through a blender to re-emulsify before serving.

The sauce is not critical but adds another dimension of flavor.  If you’re not a garlic lover, you skip the sauce and still have a delicious sandwich!

Garlic Sauce

7.  Shred the pork (I use two forks) and drizzle with the mojo sauce you set aside earlier.  If the pork still doesn’t seem moist enough to you, you can add some of the cooking juice, just try to avoid the oil floating at the top.

Pull Pork

8.  Cut your Cuban bread into sandwich-size pieces then halve the pieces.  Top with shredded pork, packing it down to keep it from falling off.

Looking for something to do with those bread heels?  I’ll admit, I usually just eat mine (the bread’s THAT good), but it’s also great with soup.  Check out our**FIX** Butternut Squash Soup, Homemade Chicken Noodle Soup, or Lasagna Soup for ideas…

Put Pork on Bread

9.  Top with a slice of fresh mozzarella and cook under the broiler until the cheese is melted and beginning to brown lightly.  Keep an eye on the bread because it toasts faster than the cheese melts – you may have to pull out the sandwich tops before the bottoms.

Melt Mozzarella

10.  Close the sandwich and you’re ready to dig in!

Mojo Pork Sandwich

Serve with the garlic dipping sauce and a side.  I like to pair it with chips or a potato dish – fries or our Perfect Oven-Roasted Potato Wedges.  Leftovers reheat well and make a great packed lunch.  Enjoy!

Mojo Pork Lunch